
Introduction
Katsu, a beloved dish in Japanese cuisine, embodies the essence of comfort food with its crispy exterior and succulent filling. Derived from the term “cutlet,” Katsu typically features breaded and deep-fried meat, most commonly pork or chicken. Its significance in Japanese culture extends beyond mere sustenance; it is often associated with family meals and gatherings, evoking nostalgia and warmth. As culinary trends evolve, Katsu has found its way into modern dining experiences, particularly in the form of Katsu bowls, which combine this classic dish with a variety of toppings and accompaniments.
Katsu bowls have surged in popularity, not only due to their delightful flavor profiles but also for their versatility. These bowls can be customized to suit personal preferences, featuring an array of fresh vegetables, rice, and flavorful sauces. One of the standout components of a Katsu bowl is the homemade Tonkatsu sauce. This rich, tangy sauce elevates the dish, complementing the crispy meat while adding depth and complexity. Making your own Tonkatsu sauce allows for a tailored flavor experience, ensuring that each bite is bursting with umami goodness.
In this article, we’ll explore the magic of Katsu, delve into the essential ingredients required to craft a perfect Katsu bowl, and guide you through creating a delicious homemade Tonkatsu sauce that will impress family and friends alike.
The Magic of Katsu
At its core, Katsu is all about texture and flavor. Traditionally, it consists of a boneless cut of meat—typically pork (tonkatsu) or chicken (chicken katsu)—that is pounded until tender, seasoned, breaded, and fried to golden perfection. The breading process involves coating the meat in flour, dipping it in egg, and finally rolling it in panko breadcrumbs. The result is a crunchy exterior that contrasts beautifully with the juicy, flavorful meat inside.
Katsu has a fascinating historical background, tracing its roots back to the late 19th century during the Meiji Era. It is believed to have been inspired by Western cooking techniques, particularly those of the French and British, leading to the adaptation of breaded and fried meats in Japanese cuisine. Over the decades, Katsu has evolved, incorporating regional variations and flavors that reflect local tastes. Today, you can find Katsu in various forms, from classic pork and chicken to more adventurous options like beef and even tofu.
Nutritionally, Katsu packs a punch. It’s a significant source of protein, providing essential amino acids that support muscle development and overall health. While the breading and frying process adds a layer of richness, it’s important to consider moderation in consumption. Pairing Katsu with fresh vegetables and whole grains, such as brown rice, can enhance the dish’s nutritional profile, making it a balanced meal option.
Ingredients Breakdown
To recreate a delicious Katsu bowl at home, you’ll need to gather a set of essential ingredients. Below is a comprehensive look at the key components required for the perfect Katsu, along with insights into their roles in the dish.
Boneless Pork Chops
The star of the Katsu dish is undoubtedly the boneless pork chop. When selecting your pork, opt for cuts that are around ¾ to 1 inch thick. This thickness is crucial, as it allows the meat to cook evenly without drying out. The natural marbling of pork adds flavor and juiciness, making it an ideal choice for frying. For those looking for a leaner option, boneless chicken thighs or breasts can be substituted, although the cooking times may vary slightly.
Seasonings
Simple seasoning is key to enhancing the flavor of your Katsu. A pinch of salt and freshly ground black pepper is all you need to bring out the natural taste of the meat. Seasoning the meat before the breading process ensures that the flavors penetrate deeply, resulting in a more satisfying bite.
The Dredging Process
Achieving the perfect crust on your Katsu involves a three-step dredging process: flour, eggs, and panko breadcrumbs. Each component plays a vital role in creating that signature crunch.
– Flour: The first step in the dredging process is lightly coating the seasoned pork chop in all-purpose flour. This layer helps the egg adhere to the meat and creates a barrier that locks in moisture during frying.
– Eggs: Next, dip the floured pork chop into beaten eggs. This step is essential, as the egg acts as a binding agent, ensuring that the breadcrumbs stick to the meat. It also contributes to the rich flavor and color of the final dish.
– Panko Breadcrumbs: Finally, roll the meat in panko breadcrumbs, which are coarser than traditional breadcrumbs. Panko provides a light and airy texture, resulting in a crispier finish when fried. Be sure to press the breadcrumbs lightly onto the meat to ensure they adhere well during cooking.
Oil for Frying
Selecting the right oil for frying is crucial to achieving that coveted crispy texture. Use a neutral oil with a high smoke point, such as vegetable oil or canola oil. Maintaining the proper frying temperature—around 350°F (175°C)—is vital for ensuring that the Katsu cooks evenly and develops a golden-brown crust. A thermometer can be a helpful tool to monitor the oil’s temperature throughout the frying process, ensuring consistent results.
Creating the Perfect Tonkatsu Sauce
No Katsu bowl is complete without a flavorful Tonkatsu sauce. This sweet and tangy condiment is the perfect accompaniment to the crispy meat, adding a depth of flavor that elevates the dish. Tonkatsu sauce is a unique blend of ingredients that harmonize to create a complex flavor profile.
Traditional Components
The base of Tonkatsu sauce typically includes a combination of ketchup, soy sauce, and Worcestershire sauce. Each ingredient contributes its distinct flavor, creating a balanced sauce that complements the richness of Katsu.
– Ketchup: This tomato-based condiment provides sweetness and acidity, balancing the savory notes of the sauce.
– Soy Sauce: A staple in Japanese cooking, soy sauce adds umami and depth, enhancing the overall flavor of the sauce.
– Worcestershire Sauce: This tangy sauce contributes a hint of complexity with its blend of vinegar, molasses, and spices, rounding out the flavor profile.
Step-by-Step Breakdown of Sauce Ingredients
To craft the perfect Tonkatsu sauce, you’ll need the following ingredients:
– Ketchup: ½ cup
– Soy Sauce: ¼ cup
– Mirin: 2 tablespoons
– Worcestershire Sauce: 2 tablespoons
– Sugar (optional): 1 tablespoon, to taste
– Dijon Mustard (optional): 1 teaspoon, for a slight kick
– Garlic Powder (optional): ½ teaspoon, for added depth
– Ground Ginger (optional): ¼ teaspoon, to enhance the overall flavor
When preparing your Tonkatsu sauce, start by combining the ketchup, soy sauce, mirin, and Worcestershire sauce in a bowl. Mix thoroughly until smooth. If you prefer a sweeter sauce, gradually incorporate sugar until you reach your desired level of sweetness. The optional ingredients can be added based on personal preference, allowing you to customize the sauce to suit your taste.
Tips on Adjusting the Sauce
One of the best aspects of making your own Tonkatsu sauce is the ability to tweak the flavors to your liking. If you enjoy a spicier kick, consider adding a splash of hot sauce or a pinch of cayenne pepper. For a more pronounced sweetness, increase the amount of sugar or mirin. Experimenting with different ratios will help you discover the perfect balance that complements your Katsu bowl beautifully.
In the next section, we will provide a detailed step-by-step guide to assembling your Crispy Katsu Bowls, ensuring that each element comes together seamlessly for a delightful dining experience.

Instructions for Homemade Tonkatsu Sauce
To start off, whisking together the ingredients for the tonkatsu sauce is an essential step that cannot be overlooked. For the perfect balance of flavors, combine the following in a medium bowl:
– 1/2 cup ketchup
– 1/4 cup Worcestershire sauce
– 2 tablespoons soy sauce
– 1 tablespoon mirin (sweet rice wine)
– 1 tablespoon sugar
– 1 teaspoon Dijon mustard
– 1 teaspoon garlic powder
– 1 teaspoon ground ginger
Using a whisk, mix these ingredients until fully combined and smooth. The key here is to ensure that the sugar dissolves completely, enhancing the sauce’s sweetness and balancing the tanginess from the ketchup and Worcestershire sauce. Once mixed, let the sauce sit for at least 30 minutes before serving. This resting period allows the flavors to meld together, resulting in a richer and more complex taste.
Preparing the Pork Chops
When it comes to preparing the pork chops, attention to detail is crucial for achieving that crispy, golden exterior that defines katsu. Begin with two boneless pork chops, about 1 inch thick.
Drying and Seasoning
Start by patting the pork chops dry with paper towels. This step is essential; removing excess moisture helps the breading adhere better and contributes to a crispier finished product. Once dry, season both sides generously with salt and pepper. This not only enhances the flavor but also helps to tenderize the meat. For an extra layer of flavor, consider adding garlic powder or onion powder to the seasoning mix.
The Dredging Process
The dredging process is vital for achieving that signature crispy texture. You’ll need three shallow dishes for a three-step breading procedure:
1. Flour Mixture: Combine 1 cup of all-purpose flour with a pinch of salt and pepper.
2. Egg Wash: In another bowl, beat two large eggs until well mixed.
3. Panko Breadcrumbs: Place 1 cup of panko breadcrumbs in the third dish. Panko, made from crustless bread, is coarse and flaky, making it perfect for creating a crispy coating.
To dredge the pork, follow these steps:
1. First, coat the pork chop in the flour mixture, ensuring it’s fully covered. Shake off any excess flour.
2. Next, dip the floured chop into the egg wash, allowing any excess to drip off.
3. Finally, press the pork chop into the panko breadcrumbs, ensuring an even coating. Use your hands to gently press down on the breadcrumbs to help them stick better.
This method of dredging is crucial for ensuring the katsu has a crunchy texture and is key to achieving that satisfying crunch with each bite.
Frying Technique
Now it’s time to fry the pork chops, which is where they will transform into crispy katsu. Heat about 1/2 inch of vegetable oil in a large, deep skillet over medium-high heat. The oil should reach a temperature of around 350°F (175°C) for optimal frying. If you don’t have a thermometer, you can test the oil readiness by dropping a small piece of panko into the oil. If it sizzles immediately, the oil is hot enough.
Carefully place each breaded pork chop into the hot oil, being cautious not to overcrowd the pan. Fry the pork for about 4-5 minutes on each side or until golden brown and cooked through. Use a slotted spoon to turn the chops, allowing for even cooking. It’s essential to monitor the oil temperature throughout the frying process. If the oil cools down too much, the katsu will absorb excess oil and become greasy, while oil that’s too hot can burn the coating before the meat cooks through.
Once cooked, remove the pork chops from the oil and place them on a plate lined with paper towels to absorb any excess oil.
Slicing Your Katsu
Once your katsu is cooked, the presentation is key, especially when assembling your bowl. Allow the pork to rest for a few minutes before slicing. This resting period helps retain juices, preventing the meat from drying out.
To slice the pork chops for your katsu bowl, use a sharp knife and cut against the grain into strips about 1/2 inch thick. Cutting against the grain ensures tenderness and enhances the overall eating experience. Arrange the slices neatly on a plate or bowl, showcasing that beautiful crispy exterior.
Assembling Your Katsu Bowl
Now that you’ve prepared the katsu, it’s time to assemble your bowl. Start with a base of fluffy steamed rice—Japanese short-grain rice is ideal for its sticky texture.
Step-by-Step Assembly
1. Layer the Rice: Spoon a generous portion of rice into the bottom of your bowl, creating a small mound. The rice serves as the foundation for your katsu and absorbs any sauces that will be added.
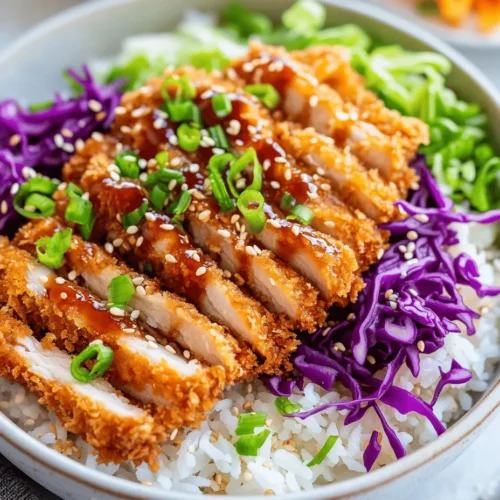
2. Add the Katsu: Arrange the sliced katsu on top of the rice, fanning out the pieces for a visually appealing presentation.
3. Pour on the Tonkatsu Sauce: Drizzle a generous amount of homemade tonkatsu sauce over the katsu. You can also serve extra sauce on the side for dipping.
4. Garnish: Top your bowl with sliced green onions, a sprinkle of sesame seeds, and pickled ginger for added color and flavor.
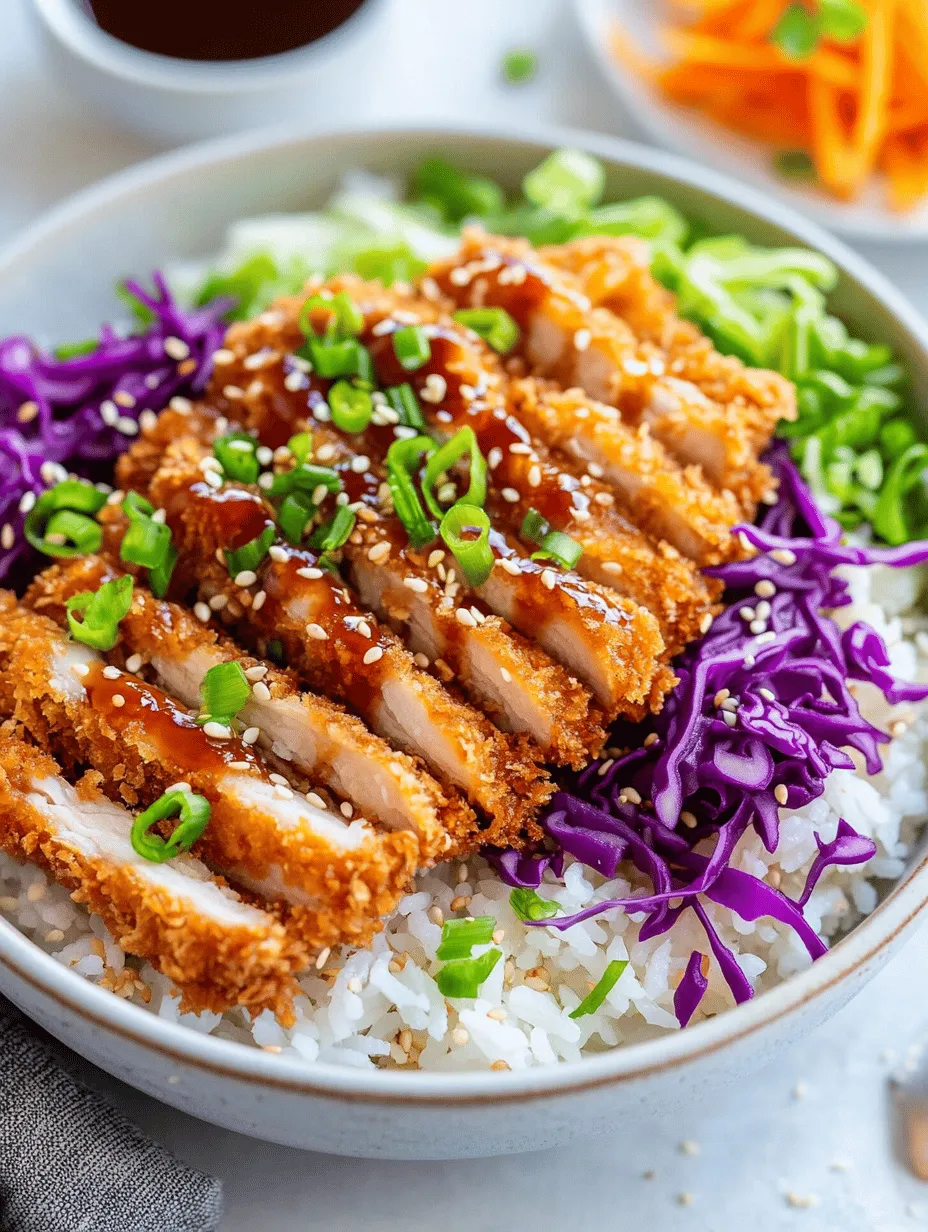
Importance of Presentation
Layering and presentation are crucial when assembling your katsu bowl. A well-presented dish not only looks appetizing but also enhances the dining experience. Consider using a wide, shallow bowl to showcase the vibrant colors of each ingredient.
Enjoying Your Katsu Bowl
Pair your crispy katsu bowl with a refreshing beverage to complement the meal. Some excellent options include:
– Green Tea: A classic pairing that offers a gentle contrast to the savory flavors of the katsu.
– Sake: For a more traditional experience, cold or warm sake can elevate your meal.
Consider serving your katsu bowl with a side of miso soup or a simple salad dressed with sesame vinaigrette. These dishes balance the richness of the katsu and add additional textures and flavors to your meal.
Cultural Significance
In Japan, enjoying meals together is a cherished tradition, emphasizing the importance of sharing food with family and friends. Katsu bowls are often enjoyed in casual settings, making them a fantastic dish for gatherings and special occasions alike. The process of making katsu—from the careful preparation of ingredients to the final presentation—creates an opportunity for connection and shared joy.
Conclusion
Making and enjoying crispy katsu bowls with homemade tonkatsu sauce is a delightful experience that brings comfort and satisfaction. The combination of tender, juicy pork, crispy coating, and rich sauce creates a dish that is not only delicious but also visually appealing.
Feel free to explore variations of this recipe, such as using chicken or tofu for a different protein option, or experimenting with different garnishes and side dishes. The beauty of homemade meals lies in the ability to customize and adapt recipes to suit your preferences.
Ultimately, the joy of cooking and sharing meals with loved ones nurtures relationships and creates lasting memories. Dive into this culinary adventure and enjoy the delicious results of your efforts!