

Introduction
In the world of desserts, few treats can rival the joy of biting into a fudgy brownie or a chewy cookie. Each offers a unique indulgence that satisfies sweet cravings in its own way. But what if you could have the best of both worlds in one delightful dessert? Enter the Browkies—a heavenly combination of rich brownie and soft cookie layers that will undoubtedly satisfy any sweet tooth.
These delightful treats have captured the hearts of dessert lovers everywhere, not only for their delicious taste but also for their unique texture. Browkies serve as a perfect solution for those who find it impossible to choose between a brownie and a cookie. With their fudgy centers and chewy edges, Browkies create a symphony of flavors and textures that is hard to resist. In this article, we will delve into the art of creating the perfect Browkies, offering a step-by-step guide, insights into the essential ingredients, and tips for achieving that ideal texture. Prepare to impress your friends and family with this irresistible treat!
Understanding Browkies: What Makes Them Special?
Browkies, or brownie-cookie hybrids, are a unique dessert born out of the desire to combine two beloved baked goods into one. The concept of merging brownies and cookies emerged in the early 2000s and quickly gained traction among home bakers and professional chefs alike. This innovative dessert has evolved into a staple recipe in many households, celebrated for its versatility and appeal.
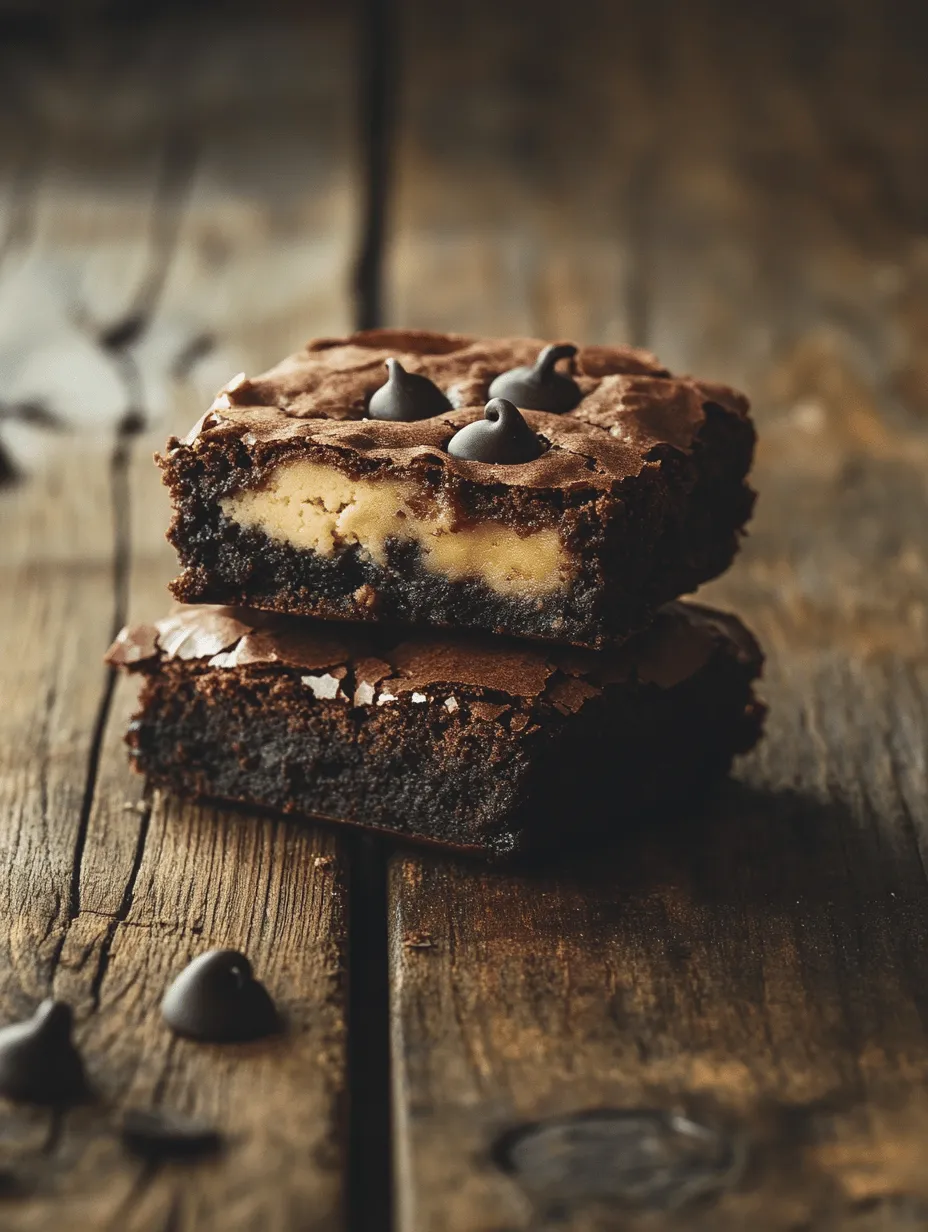
The appeal of Browkies lies not only in their taste but also in their visual allure. With a contrasting top layer of cookie dough sitting atop a luscious brownie base, they present an irresistible combination that is as pleasing to the eye as it is to the palate. The distinct layers of fudgy chocolate brownie and soft, chewy cookie create a delightful experience with every bite.
What sets Browkies apart is the ability to customize them according to personal preferences. You can incorporate various mix-ins such as nuts, chocolate chunks, or even a sprinkle of sea salt on top, allowing for a personalized touch. The result is a dessert that caters to both chocolate lovers and cookie enthusiasts, making it a perfect dessert for gatherings, potlucks, or simply satisfying your sweet cravings at home.
The Science Behind the Ingredients
Creating the perfect Browkies requires a thoughtful selection of ingredients, each playing a crucial role in achieving the desired taste and texture. Let’s take a closer look at the essential ingredients that contribute to the magic of Browkies:
– Unsalted Butter: This is the foundation of both layers, contributing to the richness and moisture of the Browkies. Unsalted butter allows for better control of the overall saltiness in the dessert, ensuring a balanced flavor.
– Sugars: The combination of granulated and brown sugar is vital for flavor and texture. Granulated sugar provides sweetness and helps the Browkies rise, while brown sugar adds a hint of caramel flavor and moisture, resulting in a chewy texture.
– Eggs: Eggs act as binding agents in the Browkies, adding structure and moisture. They play a significant role in the overall texture, ensuring that the Browkies are not only fudgy but also chewy.
– Flours: All-purpose flour is typically used for Browkies, influencing the texture across both layers. The right amount of flour is essential for achieving a balance between a soft, chewy cookie layer and a fudgy brownie base.
– Cocoa Powder and Chocolate Chips: Cocoa powder provides that deep chocolate flavor that is essential for Browkies, while chocolate chips add bursts of melty chocolate in every bite. The combination creates a rich chocolate experience that is truly indulgent.
– Leavening Agents: Baking powder and baking soda help achieve the desired rise and chewiness in the Browkies. They work together to create a light and airy texture, making each bite feel less dense while still maintaining that fudgy goodness.
Understanding these ingredients will not only help you appreciate the Browkies more but will also empower you to make adjustments based on your preferences or dietary restrictions.
Preparing the Browkies
Now that we’ve explored the ingredients that make up these delightful treats, it’s time to dive into the preparation process. Creating Browkies may seem daunting, but with a clear, step-by-step guide, you’ll find that it’s an enjoyable and rewarding experience.
Ingredients List
Before you get started, gather the following ingredients:
For the Brownie Layer:
– 1/2 cup unsalted butter (1 stick)
– 1 cup granulated sugar
– 1/2 cup brown sugar, packed
– 2 large eggs
– 1 teaspoon vanilla extract
– 1 cup all-purpose flour
– 1/3 cup unsweetened cocoa powder
– 1/2 teaspoon baking powder
– 1/4 teaspoon salt
– 1 cup chocolate chips
For the Cookie Layer:
– 1/2 cup unsalted butter (1 stick), softened
– 1/2 cup granulated sugar
– 1/2 cup brown sugar, packed
– 1 large egg
– 1 teaspoon vanilla extract
– 1 1/2 cups all-purpose flour
– 1/2 teaspoon baking soda
– 1/4 teaspoon salt
– 1 cup chocolate chips
Step-by-Step Guide to Preparing Browkies
1. Preheat the Oven: Begin by preheating your oven to 350°F (175°C). This will ensure that your Browkies bake evenly and thoroughly.
2. Prepare the Baking Pan: Line a 9×13-inch baking pan with parchment paper. This will make it easier to remove the Browkies once baked and will help prevent sticking.
3. Make the Brownie Layer:
– In a medium saucepan, melt 1/2 cup of unsalted butter over low heat. Once melted, remove from heat and stir in the granulated sugar and brown sugar until well combined.
– Add the eggs one at a time, mixing well after each addition. Stir in the vanilla extract.
– In a separate bowl, whisk together the flour, cocoa powder, baking powder, and salt. Gradually add the dry ingredients to the wet mixture, stirring until just combined. Be careful not to overmix.
– Fold in the chocolate chips, ensuring they are evenly distributed throughout the brownie batter.
4. Prepare the Cookie Layer:
– In a large bowl, cream together 1/2 cup of softened unsalted butter, granulated sugar, and brown sugar until light and fluffy.
– Beat in the egg and add the vanilla extract, mixing until fully incorporated.
– In another bowl, whisk together the flour, baking soda, and salt. Gradually add this mixture to the wet ingredients, stirring until combined.
– Fold in the chocolate chips, distributing them evenly throughout the cookie dough.
5. Layering the Browkies:
– Pour the brownie batter into the prepared baking pan, spreading it evenly to cover the bottom.
– Gently spoon dollops of the cookie dough over the brownie layer. Use a spatula or the back of a spoon to spread the cookie dough evenly over the brownie layer. It’s okay if some brownie batter shows through; this will create a beautiful marbled effect.
6. Baking: Place the baking pan in the preheated oven and bake for 25-30 minutes, or until a toothpick inserted into the center comes out with a few moist crumbs (not wet batter). The Browkies will continue to set as they cool.
7. Cooling: Once baked, remove the pan from the oven and allow the Browkies to cool in the pan for about 10-15 minutes. Then, carefully lift them out using the parchment paper and let them cool completely on a wire rack.
This step-by-step process not only ensures that your Browkies turn out perfectly but also allows for modifications and personal touches as you become more experienced. Now that you have the foundational knowledge and steps, you’re well-equipped to create this delightful fusion of brownies and cookies.

Preheating the Oven
Before you embark on your journey to create the best fudgy chewy browkies, preheating the oven is a crucial first step. Temperature control is vital in baking, as it affects how your ingredients interact during the baking process. For browkies, you’ll want to preheat your oven to 350°F (175°C). This temperature ensures that both the brownie and cookie layers will bake evenly, allowing for that perfect fudgy texture in the brownies and a chewy finish in the cookies. While your oven is heating, take the time to gather your ingredients and prepare your baking pan, optimizing your workflow and ensuring a smooth baking experience.
Making the Brownie Layer
The brownie layer is where the magic of fudginess begins. Start by melting the butter in a microwave-safe bowl. You can do this in 30-second increments to prevent burning. Once melted, allow it to cool slightly before mixing in your sugars. This step is important because adding eggs to hot melted butter can lead to a scramble instead of a smooth batter.
Incorporate the granulated sugar and brown sugar into the melted butter, stirring until fully combined. The sugars should dissolve into the butter, creating a glossy mixture. Next, add the eggs one at a time, mixing well after each addition. This not only helps in achieving a smooth batter but also incorporates air for leavening.
Once your eggs are well mixed, add the vanilla extract. In a separate bowl, whisk together the dry ingredients: all-purpose flour, cocoa powder, baking powder, and salt. Gradually fold the dry mixture into the wet ingredients, being careful not to overmix. The goal is to combine them just until you see no more flour streaks. Overmixing can lead to a tough brownie layer, which is not what you want for your browkies.
Crafting the Cookie Layer
Now, let’s move on to crafting the cookie layer, which adds that delightful chewiness to the browkies. Start by creaming together the softened butter and sugars (both granulated and brown) in a large mixing bowl. Use an electric mixer on medium speed for about 2-3 minutes until the mixture is light and fluffy. This step is crucial as it incorporates air, helping the cookies rise while they bake.
Next, add the egg and vanilla extract to the creamed mixture, mixing until fully incorporated. In a separate bowl, combine the dry ingredients: all-purpose flour, baking soda, and salt. Gradually add the dry mixture to the wet ingredients, stirring until just combined. You want to avoid overmixing here as well; a few flour streaks are perfectly fine. Finally, fold in chocolate chips or chunks for added richness and texture.
Assembling the Browkies
With both layers prepared, it’s time to assemble your browkies. Start by greasing a 9×13-inch baking pan or lining it with parchment paper for easy removal. Pour the brownie batter into the bottom of the pan, spreading it evenly with a spatula.
Next, dollop spoonfuls of the cookie dough over the brownie layer. This method will create an attractive marbled effect once baked. Using a butter knife or a skewer, gently swirl the two batters together. Be careful not to overmix; you want distinct layers to create that beautiful marbled appearance.
Once you’re satisfied with the swirl, it’s time to bake!
Baking the Browkies to Perfection
Place the assembled browkies in your preheated oven and bake for 25-30 minutes. The exact time may vary depending on your oven, so keep an eye on them. The browkies are done when the edges look set and the center is just slightly soft. You can test for doneness by inserting a toothpick in the center; it should come out with a few moist crumbs but not wet batter.
Baking for the right amount of time is crucial for achieving that perfect texture. If baked too long, you risk losing the fudgy quality of the brownies. Once baked, remove the browkies from the oven and allow them to cool in the pan for about 10-15 minutes before transferring them to a wire rack to cool completely. This cooling process is essential; it helps the browkies firm up, making them easier to cut into squares.
Serving Suggestions
When it comes to serving your delectable browkies, the possibilities are endless. You can cut them into generous squares and serve them as-is for a simple yet indulgent treat. For a gourmet touch, consider pairing your browkies with a scoop of vanilla or chocolate ice cream. The warm, fudgy texture of the browkies contrasts beautifully with the cold, creamy ice cream, creating a delightful combination that is sure to impress.
Additionally, you can elevate your presentation further with drizzles and toppings. A rich chocolate ganache drizzled over the top adds an extra layer of indulgence, while a dollop of whipped cream makes for a delightful contrast in textures. Chopped nuts, such as walnuts or pecans, can also be sprinkled on top for added crunch and flavor.
Storage and Shelf Life
To maintain the freshness and deliciousness of your browkies, proper storage is key. If you have leftovers (though they may not last long!), allow them to cool completely before transferring them to an airtight container. Store at room temperature for up to 3 days.
If you want to extend their shelf life, consider refrigerating them, where they can last up to a week. Browkies can also be frozen for longer storage. To freeze, wrap them tightly in plastic wrap followed by aluminum foil or place them in a freezer-safe container. They can last up to three months in the freezer. When you’re ready to enjoy them again, simply thaw at room temperature or warm them slightly in the microwave.
Conclusion
Browkies are truly a delightful creation that combines the best attributes of brownies and cookies into one incredible dessert. With their fudgy, chewy layers and rich chocolate flavor, they are sure to become a favorite in your baking repertoire. The process of making browkies is straightforward, and by following this detailed guide, you can create a batch that will impress anyone who tries them.
Indulging in this delightful recipe will not only satisfy your sweet tooth but also create lasting memories with friends and family. So, gather your ingredients, preheat your oven, and experience the joy of browkies for yourself! Whether enjoyed warm from the oven or paired with your favorite ice cream, these treats are bound to be a hit.
